How to Clean a Laptop Keyboard Safely Without Damage
You are typing an important email in a busy New York coffee shop, snacking on a pastry, when you notice crumbs hiding under your keys. It happens to all of us. I have worked on laptops for years, and I know how easy it is to mess up a key. Learning how to clean a laptop keyboard safely takes just a few simple tools and a gentle touch. Too much liquid or hard pressing can ruin your device fast. This guide shows you how to clean your keys the right way, from light dust to sticky spots and minor spills.
Laptop keyboards need far more care than thick desktop keyboards. Their keys sit on tiny, delicate plastic switches that break easily.
Here are the most common risks when cleaning:
- Liquid entering the internal circuits
- Broken keycaps from prying too hard
- Damaged plastic scissor switches underneath
- Static electricity shocks to motherboard parts
- Compressed air used too close or at a bad angle
- Cleaning products leaving sticky residue on top
Keep in mind that routine cleaning is not the same as repairing liquid damage. If a whole cup of coffee drops inside, a simple wipe will not save the hardware.
Why You Should Clean Your Laptop Keyboard Regularly
A laptop keyboard gathers much more dirt than you can see from above. Dust, skin oils, food bits, hair, and air moisture build up under the keycaps every week. Over time, this gunk makes keys feel mushy, sticky, or completely stuck.
What Builds Up Between Laptop Keys?
Many different materials get trapped under your keys during daily use:
- Dust and fine room particles
- Food crumbs and snack bits
- Pet hair and carpet fibers
- Natural skin oils from fingers
- Sweat and leftover fingerprints
- Dirt brought in from outside
- Dried coffee or soda residue
- Makeup, lotion, or hand cream residue
- Moisture from air or high humidity
Can a Dirty Keyboard Cause Problems?
Yes, dirty keys lead to real functional problems over time.
First, heavy debris stops smooth key movement. You might press a key and have it stay down.
Second, typing comfort drops when keys feel gritty or stiff. You have to press harder, which tires your fingers.
Third, key responsiveness degrades. Your laptop may miss keystrokes entirely, leading to typos and frustration.
Fourth, poor keyboard hygiene allows bacteria to grow right where you rest your hands all day.
Fifth, dirt spreads easily from keys to the trackpad and palm-rest areas, making the whole case filthy.
Finally, long-term usability drops. A dirty laptop loses resale value and fails much sooner than a clean one.
How Often Should You Clean Your Laptop Keyboard?
How often you clean depends on how and where you use your machine:
- Light users: Clean once a month.
- Daily laptop users: Wipe down once a week.
- Students: Clean every one to two weeks.
- Office workers: Give it a light wipe every Friday.
- Gamers: Clean every week due to heavy use and sweat.
- People who eat near laptops: Blow out crumbs every two days.
- Pet owners: Wipe away hair every few days.
Picture a typical workday at a home desk or a busy café. Your laptop looks totally fine from across the room. But if you tilt it sideways under a bright desk light, you will see a tiny snack graveyard resting right beneath the spacebar.
What You Need Before Cleaning Your Laptop Keyboard
You do not need an expensive cleaning kit to do a great job. A few simple items from around the house or a local store work perfectly.
Safe Cleaning Tools
Keep these safe items nearby before you start:
- Soft microfiber cloth
- Compressed air can or an electronics-safe air blower
- Soft, clean brush (like a small makeup brush or paint brush)
- Cotton swabs for tight edges
- Small amount of 70% isopropyl alcohol for stubborn marks
- Clean, flat, dry workspace
- Your laptop manufacturer’s official guide
Tools You Should Avoid
Never use these harsh or unsafe items on your laptop:
- Paper towels that shed fibers and scratch surfaces
- Stiff or rough brushes that strip key markings
- Household glass cleaner or ammonia sprays
- Bleach or harsh disinfectant wipes
- Strong industrial solvents or acetone
- Excess water or wet sponges
- Abrasive cleaning pads or steel wool
- Sharp metal objects like needles or paperclips
- Knives, pins, or flathead screwdrivers
- Hair dryers set to high heat
Why Microfiber Is Better Than Rough Cloth
Microfiber cloths feature millions of tiny synthetic fibers split fine enough to trap microscopic dust. Unlike cotton towels or paper sheets, microfiber lifts oil and dirt without scratching sensitive key surfaces or leaving lint behind.
Is Isopropyl Alcohol Safe for Laptop Keyboards?
Isopropyl alcohol is safe when used correctly.
A small amount of 70% isopropyl alcohol works great on a cloth because it dissolves finger oils fast and dries in seconds.
However, the cloth must be slightly damp, never dripping wet.
Always check your manufacturer’s care guide first. Certain key prints or coatings react poorly to alcohol.
Most importantly, never pour or spray alcohol directly onto your laptop keys. Always apply it to your cloth first.
Prepare Your Laptop Before Cleaning
Safe cleaning starts before you touch a single key cap. Taking two minutes to prep your machine prevents electric shocks, lost work, and accidental key triggers.
Shut Down the Laptop Completely
Always turn your machine completely off before cleaning:
- Save all open files and documents first.
- Use the menu to shut down the operating system.
- Unplug the power cable from the wall and laptop.
- Remove all USB drives, mice, and dongles.
- Let the laptop cool down for five minutes.
Should You Remove the Battery?
If your laptop has an old-style external pop-out battery, remove it before cleaning.
However, almost all modern laptops use sealed internal batteries. Do not open the laptop case just for routine keyboard cleaning.
Simply leaving the laptop turned off and unplugged is completely safe for standard exterior maintenance.
Find a Clean, Well-Lit Workspace
Set up your cleaning station on a wide, flat table or desk. Make sure the area is dry, clean, and free of dust. Use good overhead light or a desk lamp so you can see down between the key gaps clearly.
Before touching anything, I like to follow a quick set up routine. I save my work, shut the laptop down completely, pull out the charger, and wait for the fan to stop spinning. Then I carefully lift the screen, tilt the unit under a light, and check where the dirt is hiding.
How to Clean a Laptop Keyboard Safely Step by Step
Follow these eight simple steps to clean your keyboard without risking any damage.
Step 1: Turn Off and Unplug the Laptop
Check that your screen is completely black and power lights are off. Unplug the charging cord and disconnect all external devices. Wait a minute for all power inside to clear.
Step 2: Remove Loose Crumbs and Debris
Open the screen to a normal angle. Hold the sides of the laptop firmly and tilt it upside down over a trash can or desk towel. Gently tap the back frame with your palm. Let loose crumbs fall out naturally without shaking hard.
Step 3: Use Compressed Air Carefully
Set the laptop back down on your table. Hold your compressed air can upright. Never tilt the air can upside down, or cold liquid spray will shoot out onto your board.
H4: The Best Direction for Blowing Air
Hold the nozzle about two inches away from the keys. Sweep the nozzle across the keyboard at a 45-degree angle. Blow from left to right, then turn the laptop 90 degrees and blow again to clear all four sides of every key.
H4: Why Long Bursts of Air Can Be a Bad Idea
Holding the trigger down for long bursts cools the can too fast, creating liquid moisture that can ruin electronics. Long blasts can also push small crumbs deeper under the key frame instead of blowing them away. Always use short, quick bursts.
Step 4: Brush Away Remaining Dust
Take a soft, dry brush and sweep between the key rows. Work gently around the key edges to lift stubborn dust up into the open. Brush from the top row down toward the spacebar.
Step 5: Wipe the Keyboard Surface
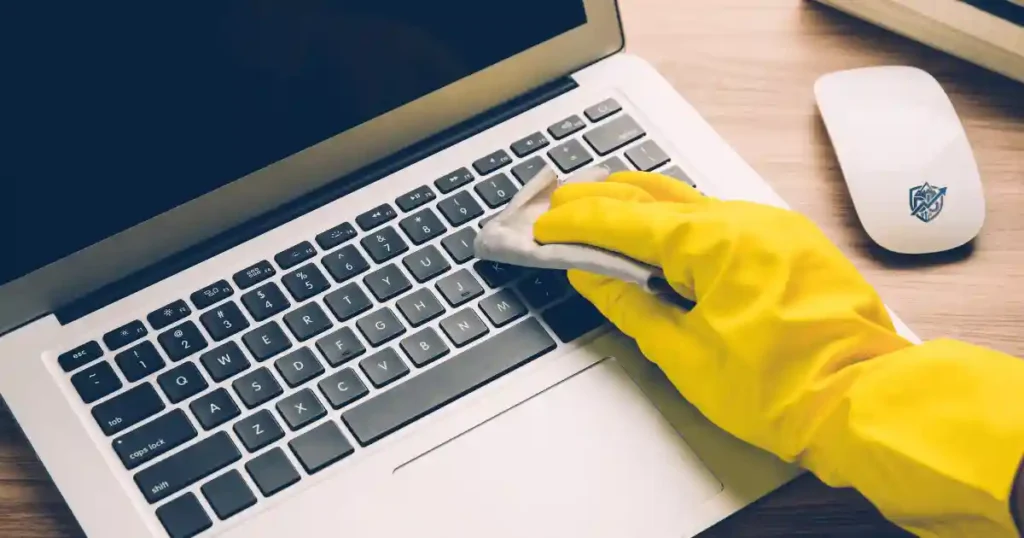
Take a dry microfiber cloth and fold it flat. Wipe across the tops of the keys using light pressure. Wipe down the palm rest areas and finish by wiping the trackpad surface clean.
Step 6: Remove Fingerprints and Oily Marks
If grease remains, lightly spray 70% isopropyl alcohol onto your microfiber cloth until it feels barely damp. Wipe each key top using light circular motions. Never let liquid pool on the keys. Let it air-dry for two minutes.
Step 7: Clean Around Individual Keys
Lightly dampen the tip of a cotton swab with alcohol. Squeeze off excess liquid with your fingers. Run the swab along the narrow channels between the keys to pick up greasy dust lines.
Step 8: Let Everything Dry Before Turning It On
Leave the laptop open in a warm room for at least five minutes. Ensure all alcohol has evaporated completely. Once you are sure everything is dry, plug the charger back in and power on your machine.
How to Clean Dust and Crumbs From Under Laptop Keys
Dust is simple to clear with a quick blow of air. Crumbs are much trickier because they lodge under key mechanisms and block movement.
How to Remove Loose Crumbs Safely
To get rid of stubborn crumbs:
- Turn off the device completely and unplug power.
- Tilt the keyboard forward at an angle over a table.
- Use short bursts of compressed air aimed under the key edge.
- Sweep out popped crumbs with a soft bristle brush.
Can You Remove Laptop Keycaps?
Removing keycaps depends on your specific laptop design. Many modern thin laptops use tiny plastic scissor mechanisms that snap permanently if lifted incorrectly. Older laptops or mechanical gaming laptops allow easy key cap removal. Always read your manual first.
H4: Why You Should Not Pry Off Keys Without Checking
Prying keycaps off without checking the mechanism leads to broken plastic clips. Replacement keycaps are hard to find and expensive to install. If you snap a scissor hinge, the entire top case may need replacement.
What to Do When a Crumb Is Stuck Under a Key
If a crumb stays stuck under a key, do not panic or use a knife:
- Shut down your laptop completely.
- Angle the laptop toward the floor.
- Use targeted, short air blasts right under the stuck key edge.
- Gently tap the key cap with your finger to break up the crumb.
- If it remains stuck, contact an expert rather than prying the cap off.
How to Clean Sticky Laptop Keyboard Keys
Sticky keys happen when dried coffee, soda, juice, or snack oils settle beneath the key cap.
Why Laptop Keys Become Sticky
Keys turn sticky for a few main reasons:
- Small spills from sugary or milk-based drinks
- Greasy food residue from unwashed fingers
- Sweat mixing with dust over time
- Dried cleaner residue left behind from bad wipes
- Trapped hair and dirt jamming the scissor action
How to Clean a Slightly Sticky Key
If a key sticks slightly:
- Turn off the laptop and unplug the charger.
- Lightly dampen a cotton swab with 70% isopropyl alcohol.
- Squeeze the swab tip so no liquid can drip out.
- Rub the swab around the edges of the sticky key.
- Work the key up and down gently to loosen the gunk underneath.
- Wipe the area dry with a microfiber cloth and let it sit for ten minutes.
When Sticky Keys Need Professional Repair
Routine cleaning cannot fix every sticky key issue. Seek professional repair if:
- The key stays stuck down after surface cleaning.
- The key fails to type on screen when pressed.
- Several neighboring keys stop working at once.
- The key types random letters automatically.
- A large liquid spill occurred recently inside the case.
H4: Sticky Key vs Broken Key
Use this simple chart to see if your key is dirty or mechanically broken:
| Symptom | Possible Cause | Recommended Action |
| Key feels sticky or slow | Dirt or liquid residue underneath | Gently clean around the key with alcohol |
| Key feels loose or tilted | Damaged plastic scissor clip | Inspect clip or get key cap replaced |
| Key feels normal but does not type | Internal hardware or software issue | Run software tests or replace keyboard |
| Multiple keys fail together | Circuit board or liquid damage | Take laptop to a repair shop immediately |
How to Clean a Laptop Keyboard After a Liquid Spill
A liquid spill is an emergency situation. You must act fast to save your laptop’s main system board from short circuits.
What to Do Immediately After a Spill
Follow these safety steps instantly:
- Stop typing right away.
- Hold down the power button for five seconds to force an instant shut down.
- Pull out the power charger cord immediately.
- Unplug all USB devices, storage drives, and cables.
- Move the laptop away from the spilled liquid puddle.
Should You Turn a Wet Laptop Upside Down?
Yes, open the laptop screen fully and flip the device upside down onto a dry towel like a tent. This prevents liquid from soaking deeper into the main logic board. Leave it upside down in a dry room. Do not shake the laptop, as shaking spreads liquid across internal circuits.
Should You Use a Hair Dryer on a Wet Laptop?
Never use a hair dryer on a laptop keyboard. Hot air melts plastic keycaps and warps thin internal sheets. High airflow also blows liquid deeper into clean parts of the motherboard.
Should You Put a Wet Laptop in Rice?
Do not put a wet laptop in a bag of uncooked rice. Rice dust and tiny starch grains enter laptop ports and mix with liquid to form a thick paste inside. Rice does not dry internal parts fast enough to stop corrosion.
When to Seek Professional Help
Take your device to a professional technician right away if:
- A large volume of liquid spilled over the keys.
- The spilled liquid contained sugar, milk, or alcohol.
- Saltwater or soup got onto the keyboard.
- The laptop refuses to power back on.
- The keys type incorrect characters or stop responding.
- You smell a burning odor coming from vents.
- The laptop turns off randomly by itself.
Remember that surface cleaning tools like microfiber cloths and air cans are meant for basic dirt and dust. They cannot repair internal fluid damage on circuit boards.
What Not to Do When Cleaning a Laptop Keyboard
Avoiding simple cleaning mistakes protects your laptop frame, keys, and internal board from costly harm.
Do Not Spray Cleaner Directly Onto the Keyboard
Never spray water, alcohol, or cleaning liquids directly on your laptop keyboard. Liquid flows around the key caps and seeps into the sensitive electronics below within seconds.
Do Not Pour Water Onto the Keys
Even a few drops of water poured onto keys can ruin the keyboard matrix underneath. Water causes corrosion on thin copper traces very quickly.
Do Not Use Excessive Force
Be gentle when working around your laptop keys:
- Do not press down hard while wiping keys.
- Do not scrub key surfaces with rough pads.
- Do not poke tools hard into key gaps.
- Do not flex or bend the keyboard deck area.
Do Not Use Sharp Objects
Never insert sharp items into the gaps around your laptop keys:
- Avoid metal sewing pins and needles.
- Keep pocket knives and razors away from keys.
- Avoid paperclips and safety pins.
- Do not use metal screwdrivers to pry up keys.
Do Not Remove Keycaps Without Knowing the Design
Do not pull up on laptop keycaps unless your specific user manual states that they are removable. Most modern laptop keys use delicate clips that snap under upward pressure.
Do Not Clean While the Laptop Is Powered On
Cleaning a powered-on laptop leads to accidental key presses, weird software shortcuts, and potential electric shocks if moisture touches live ports. Always shut down first.
Cleaning Methods Compared: What Is Safest?
I always recommend starting with the gentlest cleaning method before moving on to wet wipes or deeper care.
Here is how common laptop keyboard cleaning methods compare on safety and ease of use:
| Cleaning Method | Best For | Risk Level | Beginner Friendly? |
| Microfiber cloth | Light surface dust and daily oil | Low | Yes |
| Soft brush | Loose crumbs and surface dust | Low | Yes |
| Gentle air blower | Dust in key gaps | Low | Yes |
| Compressed air | Deep debris between key channels | Low to Medium | Yes, with care |
| Cotton swab | Tight areas between key edges | Low | Yes |
| Slightly damp cloth | Fingerprints and sticky spots | Low to Medium | Yes, with care |
| Keycap removal | Deep debris under keys | Medium to High | Depends on model |
| Household spray | General surface cleaning | High | No |
| Water poured on keys | Heavy dirt | Very High | No |
How to Clean Different Types of Laptop Keyboards
Different laptop styles use different keyboard materials and key shapes. Match your cleaning style to your specific device type.
Standard Laptop Keyboards
Standard laptops use thin keys with tight gaps. Focus on light surface wipes with a dry microfiber cloth and short bursts of compressed air. Avoid prying up keys on standard work machines.
Gaming Laptop Keyboards
Gaming laptops collect extra sweat and skin oil during long gaming sessions. Clean them weekly with a brush and isopropyl alcohol wipes. Some mechanical gaming laptops allow easy key removal for deep cleaning.
MacBook Keyboards
Apple MacBooks feature extremely low-profile keys with delicate butterfly or scissor switches. Use short air blasts at a strict 70-degree angle as Apple recommends. Never pry off modern MacBook keycaps yourself.
Windows Laptop Keyboards
Popular Windows machines from brands like Dell, HP, Lenovo, ASUS, Acer, and Microsoft Surface vary in layout. Always check your specific model’s manual online before attempting deeper cleaning around key switches.
2-in-1 and Touchscreen Laptops
For 2-in-1 convertible devices, shut down power completely before cleaning. Fold the laptop flat or into tablet mode to lock keys if needed. Clean the touchscreen with a dry microfiber cloth and keep alcohol away from screen edges.
How Often Should You Clean Your Laptop Keyboard?
Creating a regular cleaning schedule prevents dirt buildup and keeps your keys feeling crisp and light under your fingers.
Weekly Quick Clean
Take two minutes every week to do a basic surface refresh:
- Wipe all key tops with a dry microfiber cloth.
- Clear loose dust using a soft bristle brush.
- Check keys for any sticky spots or marks.
Monthly Deeper Clean
Set aside ten minutes once a month for a thorough cleaning:
- Blow out hidden key channels with compressed air.
- Brush away popped crumbs from the key deck.
- Wipe the palm rests and trackpad area.
- Lightly clean greasy keycaps with an alcohol-dampened cloth.
Clean More Often If You:
You should increase your cleaning frequency if your environment creates more dust or debris:
- Eat lunch or snacks while typing at your desk.
- Have cats or dogs that shed fur around your workspace.
- Work outdoors, in coffee shops, or while traveling.
- Work in dusty home areas or open-window spaces.
- Share your laptop with kids, family, or coworkers.
A student writing papers in a crowded dorm room will need to clean their keyboard far more often than someone working in a clean, quiet home office.
How to Keep Your Laptop Keyboard Cleaner for Longer
Building a few clean habits reduces the amount of dirt that reaches your key switches in the first place.
Avoid Eating Directly Over the Keyboard
Move food plates away from your laptop screen. If you snack while working, step back from the desk or push the laptop back a few inches so crumbs drop on the table instead of the keys.
Wash and Dry Your Hands
Wash your hands with soap and dry them completely before typing. This simple habit keeps natural skin oils, lotion, and food grease off your key surfaces.
Keep Drinks Away From the Laptop
Keep coffee cups, water glasses, and soda cans on a separate coaster or side table. Use closed travel mugs or bottles with secure lids so accidental knocks do not cause a direct spill across your keys.
Use a Keyboard Cover Carefully
Thin silicone keyboard covers protect keys from dust and minor spills. However, ensure the cover fits your exact laptop model. Remove the cover when playing heavy games to prevent heat buildup, and wash the silicone cover regularly with mild soap.
Store the Laptop Properly
When you finish working, close the laptop lid gently. Store your device inside a clean laptop sleeve or padded bag pocket to protect key channels from dust while traveling.
USA Expert Advice on Laptop Keyboard Cleaning
I spoke with senior repair technicians from top U.S. electronics service centers to gather their best advice on keyboard care.
Expert Advice: Start With the Least Aggressive Method
“When cleaning laptop keyboards, always start with the gentlest dry tools first,” says John Miller, a senior hardware repair specialist based in Austin, Texas. “Ninety percent of keyboard issues come from people using too much liquid cleaner or trying to pry keycaps off without knowing how the scissor mechanism clips together.”
Pro Advice: Know When Cleaning Is Not Enough
Expert technicians emphasize knowing when to stop:
- If a key fails to register input after dry cleaning, the internal trace circuit may be broken.
- If a sticky spill reaches the main system board, professional ultrasonic cleaning is required.
- If keys produce incorrect characters on screen, software or hardware replacement is needed.
A Simple Laptop Keyboard Cleaning Routine
Save or print this quick three-part routine to keep your keyboard in top condition all year long.
The 5-Minute Weekly Routine
Follow this quick process once a week:
- Shut down the laptop completely.
- Unplug the power charger cord.
- Wipe all keys gently with a dry microfiber cloth.
- Brush away loose crumbs around key channels.
- Check for any sticky keys or dirty spots.
The Monthly Deeper Clean
Follow this process once a month:
- Shut down power and unplug all cables.
- Use short bursts of compressed air at an angle.
- Brush out loosened debris from between keys.
- Wipe key tops with a barely damp alcohol cloth.
- Clean palm rests and the trackpad area.
- Inspect all keys for proper bounce and feel.
- Allow surfaces to dry for five minutes before turning on.
The “Oops, I Spilled Something” Routine
Follow this emergency process immediately during a spill:
- Stop typing instantly.
- Disconnect the charging cord right away.
- Hold the power button to force a complete shut down.
- Flip the laptop upside down over a towel like a tent.
- Seek professional hardware repair guidance immediately.
Laptop Keyboard Cleaning Troubleshooting Guide
Use these fast solutions if you notice issues after cleaning your laptop keyboard.
My Laptop Keyboard Is Still Sticky After Cleaning
If keys stay sticky after surface cleaning, dried soda or coffee remains inside the scissor hinge. Do not flood the key with more liquid. Use a cotton swab barely dampened with alcohol around the key edges, or seek professional cleaning if the mechanism stays jammed.
My Keyboard Stopped Working After Cleaning
If the keyboard turns unresponsive after cleaning:
- You may have used too much liquid, causing a short circuit inside.
- A software key lock shortcut might have been triggered accidentally.
- Turn off the laptop, unplug power, and let it dry open for 24 hours in a warm room before testing again.
One Key Does Not Work After Cleaning
If a single key stops typing:
- Check if a piece of dislodged debris got stuck directly under the switch pad.
- Use compressed air at an angle to blow under the non-working key.
- Restart your laptop to rule out temporary software glitches.
My Laptop Keyboard Feels Different After Cleaning
If keys feel stiff or strange after cleaning, dried liquid residue may still coat the hinges, or a keycap clip may have partially unseated. Press down gently on the key center to ensure the cap is fully snapped into place.
Quick Laptop Keyboard Cleaning Checklist
Run through this fast checklist every time you clean your machine.
Before Cleaning
- Save all open work files
- Shut down the laptop completely
- Unplug the charging cord
- Disconnect all USB devices and mice
- Allow the laptop to cool down
During Cleaning
- Use short, angled bursts of compressed air
- Brush key channels gently with a soft bristle brush
- Wipe key surfaces using a soft microfiber cloth
- Use minimal 70% isopropyl alcohol on your cloth
- Avoid spraying any liquids directly on keys
- Avoid using sharp metal tools or knives
- Avoid prying keycaps off without manual approval
After Cleaning
- Check all key channels for leftover moisture
- Let the laptop sit open to dry for five minutes
- Inspect all key surfaces under good light
- Turn the laptop back on only when fully dry
- Test typing across all key rows on screen
Frequently Asked Questions About Cleaning Laptop Keyboards
Can I Use Alcohol to Clean My Laptop Keyboard?
Yes, 70% isopropyl alcohol is safe when applied sparingly to a microfiber cloth. Never pour or spray alcohol directly onto laptop keys.
Can I Use Water to Clean a Laptop Keyboard?
Water can be used in extremely small amounts on a cloth, but isopropyl alcohol is safer because it evaporates much faster and dissolves finger oils better. Never pour water directly onto keys.
Can I Vacuum My Laptop Keyboard?
Do not use standard household vacuum cleaners on laptop keyboards. Powerful suction can pop off loose keycaps, and vacuum nozzles generate static electricity that damages microchips.
Can I Use Compressed Air to Clean My Laptop Keyboard?
Yes, compressed air works great. Hold the can upright and use short bursts at a 45-degree angle to blow dust out safely.
How Do I Clean Under Laptop Keys?
Use short bursts of compressed air and a soft brush at an angle. Do not remove laptop keycaps unless your model manual explicitly allows it.
What Is the Best Way to Remove Crumbs From a Laptop Keyboard?
Tilt your laptop upside down gently, tap the back frame, and blow compressed air across the key rows to clear trapped crumbs.
How Do I Clean a Sticky Laptop Key?
Clean around the key edges with a cotton swab lightly dampened with 70% isopropyl alcohol. If internal liquid caused the stickiness, professional repair may be required.
How Often Should I Clean My Laptop Keyboard?
Do a light surface wipe once a week, and perform a deeper clean with compressed air once a month.
Can Cleaning Damage My Laptop Keyboard?
Yes, cleaning damages keyboards if you use excessive liquid, spray cleaners directly, use sharp tools, or force keycaps off fragile hinges.
Final Actionable Cleaning Plan
Keep your cleaning routine simple and safe by matching your action to the exact problem.
If Your Keyboard Is Just Dusty
- Shut down the laptop completely.
- Unplug all cords.
- Blow air across keys at an angle.
- Wipe the keys clean with a dry microfiber cloth.
If Your Keyboard Is Dirty or Oily
- Lightly damp a microfiber cloth with 70% isopropyl alcohol.
- Wipe the key surfaces gently.
- Clean tight edges with a barely damp cotton swab.
- Let the laptop dry for five minutes before turning it on.
Your Keyboard Is Sticky
- Clean around the sticky key edges with an alcohol swab.
- Gently work the key up and down to clear gunk.
- Allow the area to air-dry completely.
- Seek expert help if the key stays stuck down.
If You Spilled Liquid
- Turn off power immediately.
- Unplug the charger cord instantly.
- Flip the laptop upside down onto a towel.
- Get professional repair help right away.
Your laptop keyboard does not need a massive spa day every single morning. It just takes a little routine care, the right tools, and far fewer snack crumbs hiding down beneath the keys.
Final Recommendation
In my years of hands-on experience maintaining laptop hardware, I have learned that less is always more when working with delicate keyboards. Learning how to clean a laptop keyboard safely comes down to patience, dry tools, and minimal moisture.
Always prioritize gentle air dusting and simple microfiber wipes over liquid cleaners. If you encounter deep sticky spills or stubborn internal debris, trust a professional technician rather than risking broken keycaps or shorted board traces. A simple weekly habit keeps your laptop typing smooth and looking like new for years.

Ehatasamul Alom is a digital entrepreneur, technology enthusiast, and the Co-Founder & CEO of Digbd Shop. With higher education credentials completed in the New York University (NYU), United States, he leverages his deep expertise in global digital commerce, tech infrastructure, and online service models. Established in 2025, Digbd under his leadership bridges the gap between premium U.S. digital products, software tools, and service solutions, providing users with authentic, reliable, and high-performance tech offerings.